Do you have an old chair that needs a makeover? Reupholstering is a fun and easy way to transform your furniture and make it look new again. It can also help you preserve the history and charm of your antique chair while updating its style and comfort.
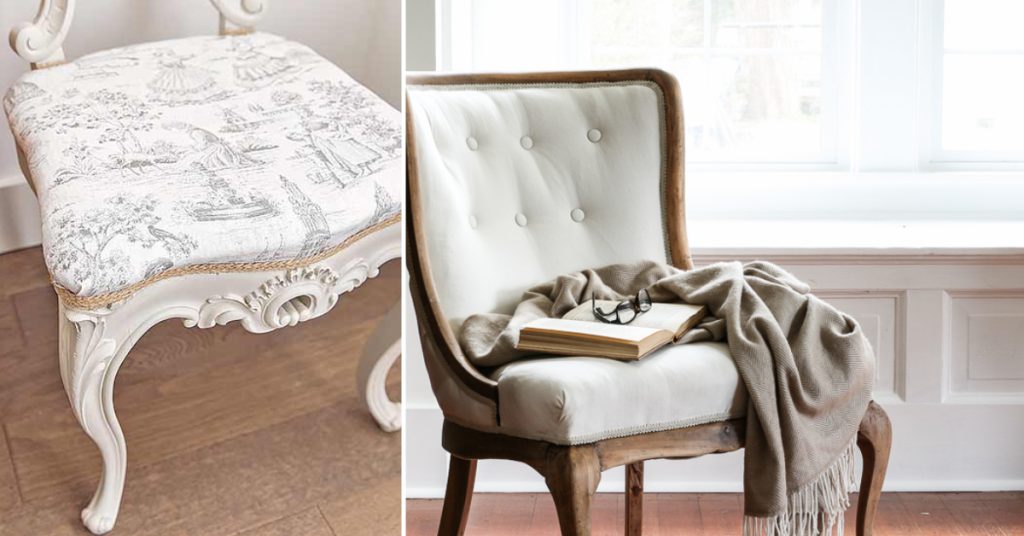
In this blog, we will show you how to reupholster an antique chair in three easy steps. You will need some basic tools and materials, such as a screwdriver, a staple gun, scissors, fabric, padding, webbing, and nails. You will also need some creativity and patience to complete this project. Reupholstering an antique chair is not only a cheap way to refresh your furniture, but also a green way to reuse your resources. By reupholstering your antique chair instead of buying a new one, you can save money and the environment. Ready to get started? Let’s go!
3 Easy Steps for How to Reupholster an Antique Chair
Here are the three steps to follow to reupholster your antique chair:
Step 1: Check and Strip the Chair
The first step is to check and strip the chair. You will need to look at the chair and see if there is any damage or wear on it. For example, you may see cracks, loose joints, broken springs, or stains on the chair. If there is any significant damage, you may need to get help from a professional before reupholstering it. If there is no significant damage, you can start to strip the chair.
To strip the chair, you will need to take off the old fabric and padding from the chair. You can do this by using a screwdriver or a pair of pliers to pull out the small metal nails that hold the fabric on the seat. Then, you can use a screwdriver to remove the seat base from the frame. After that, you can pull off the old fabric and padding from the seat base.
Step 2: Cut the New Fabric and Padding
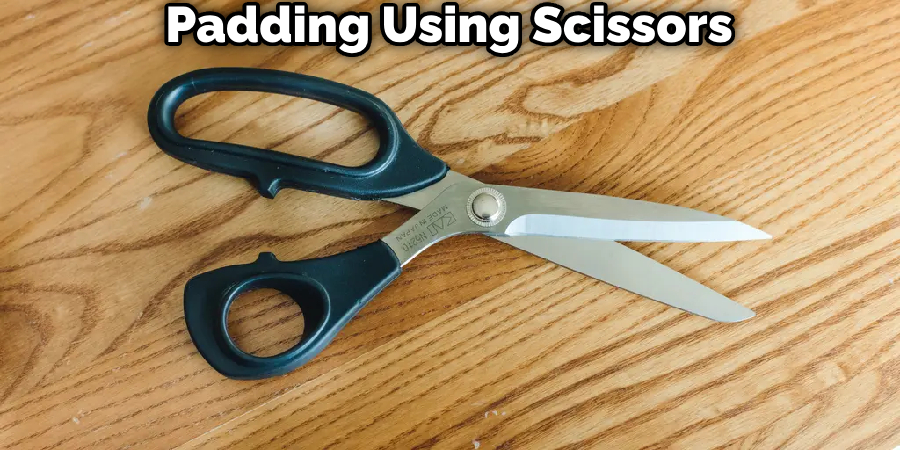
The next step is to cut the new fabric and padding for your chair. You will need to measure the size of your seat base and add some extra inches for folding over. You can use a tape measure or a ruler to do this. Then, you can mark and cut your fabric and padding using scissors or a rotary cutter. You should have two pieces of fabric (one for the top and one for the bottom) and one piece of padding that fits your seat base.
When choosing the fabric and padding for your antique chair, you should think about these things:
- The color and pattern of your fabric should match your chair’s style and design.
- The texture of your fabric should be comfortable and suitable for your use.
- The durability of your fabric should be able to last long and resist stains and fading.
- The thickness of your padding should be enough to make your seat soft and supportive.
Step 3: Staple the New Fabric and Padding
The last step is to staple the new fabric and padding to the seat base using a staple gun. You will need to put the padding on top of the seat base and line it up with the edges. Then, you will need to put the top fabric over the padding and smooth out any wrinkles. Next, you will need to flip the seat base over and staple the fabric to the bottom of the seat base. You should start from the middle of each side and work your way outwards, pulling the fabric tight as you go. You should leave some extra fabric around the edges for folding over. Then, you will need to fold and tuck the fabric neatly around the edges and corners of the seat base. You can use scissors to cut off any extra fabric if needed.
You Can Check It Out to Reupholster Wingback Chair.
4 Tips for a Better Look
To make your reupholstered chair look better, you can follow these tips:
- Make pleats or folds in your fabric to fit it around the corners of your seat.
- Cut off any extra fabric around the edges of your seat for a cleaner look.
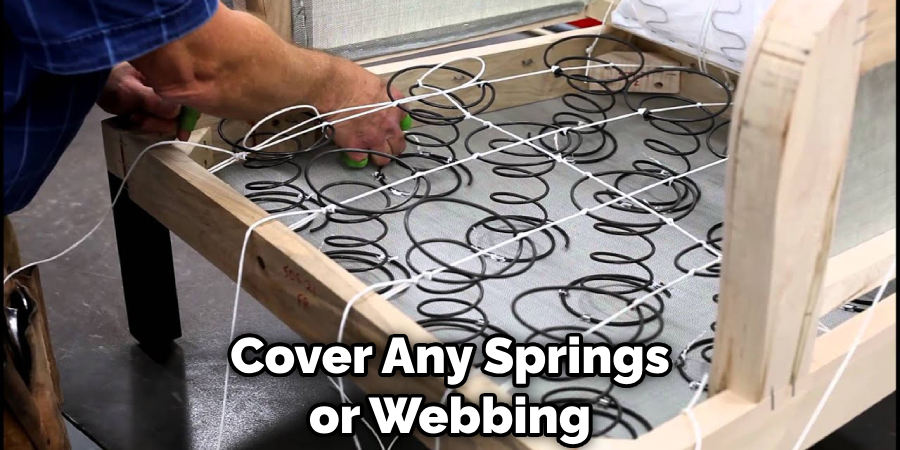
- Cover any springs or webbing under your seat with a dust cover or a black breathable fabric.
- Add some decorations to your chair, such as welting, studs, buttons, or fabric trim.
Reupholstering Over Existing Fabric: Dos and Don’ts
Sometimes, you may be tempted to reupholster over existing fabric, instead of removing it and starting from scratch. This can save you some time and effort, but it can also have some drawbacks. Here are some dos and don’ts of reupholstering over old material:
Do reupholster over existing fabric if:
- The old fabric is in good condition, without any stains, tears, or odors.
- The old fabric is thin and smooth, without any bulky seams or patterns.
- The new fabric is thick and opaque enough to cover the old fabric completely.
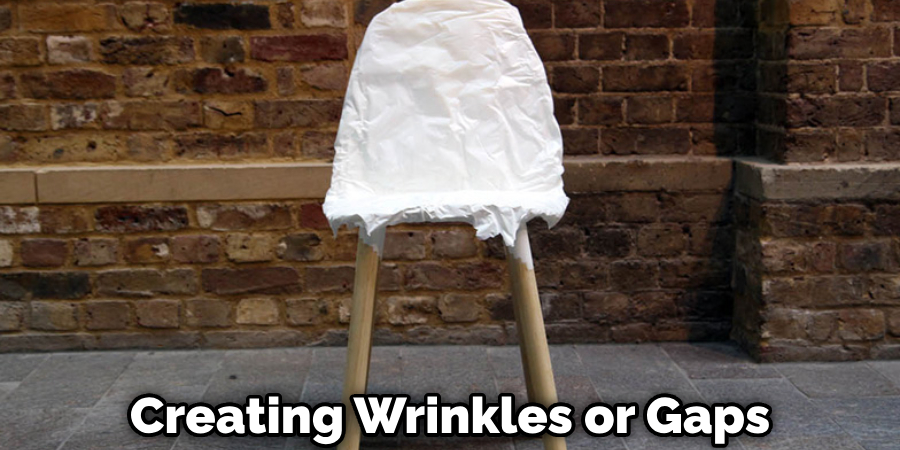
- The new fabric fits well over the old fabric, without creating any wrinkles or gaps.
Don’t reupholster over existing fabric if:
- The old fabric is in poor condition, with stains, tears, or odors that can affect the new fabric.
- The old fabric is thick and textured, with bulky seams or patterns that can show through the new fabric.
- The new fabric is thin and transparent enough to reveal the old fabric underneath.
- The new fabric does not fit well over the old fabric, creating wrinkles or gaps that can ruin the look of your chair.
Assessing the Chair’s Support System for Longevity
Reupholstering an antique chair is not only about changing the fabric and padding but also about making sure that the chair’s support system is strong and stable. The support system consists of the frame, springs, webbing, or other parts of the chair that provide shape and comfort to the seat. If these parts are damaged or worn out, they can affect the quality and longevity of your reupholstered chair. Therefore, you should assess the chair’s support system before and after reupholstering it, and make any necessary repairs or replacements. Here are some steps to follow:
- Check the frame for any cracks, splits, or loose joints. If you find any minor damage, you can use wood glue or clamps to fix it. If you find any major damage, you may need to replace the frame or consult a professional carpenter.
- Check the springs for any breaks, bends, or sags. If you find any minor damage, you can use pliers or wire cutters to fix it. If you find any major damage, you may need to replace the springs or consult a professional upholsterer.
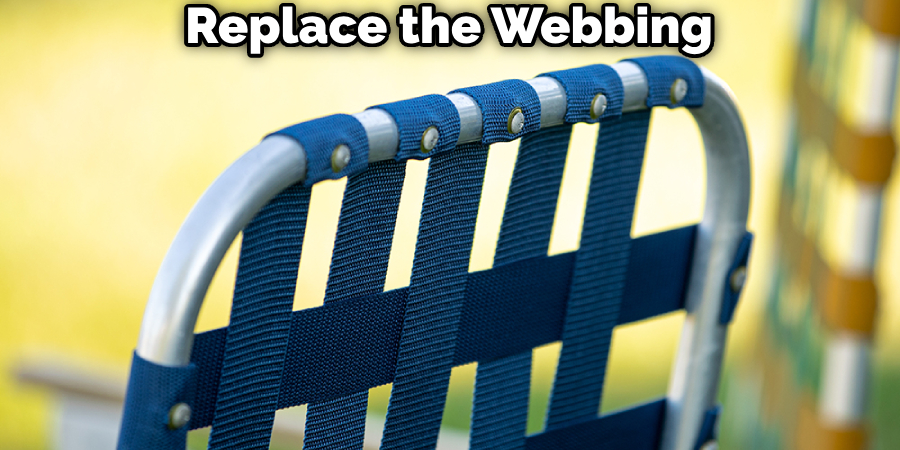
- Check the webbing for any tears, holes, or stretches. If you find any minor damage, you can use a needle and thread to fix it. If you find any major damage, you may need to replace the webbing or consult a professional upholsterer.
FAQs About How to Reupholster an Antique Chair
What Are the Disadvantages of Upholstery?
The disadvantages of upholstery include susceptibility to damage from sunlight and moisture, visible wear and tear, flammability, limited stain resistance, and high maintenance. However, the benefits often outweigh these drawbacks, making upholstered furniture a popular choice for many.
What’s the Difference Between Upholstering and Reupholstering?
Upholstering is the process of furnishing furniture with padding and fabric or leather covers. Re-upholstering involves a more comprehensive approach, stripping off all fabric, stuffing, and springs, and rebuilding the furniture from the frame up with new materials. Re-covering is a part of re-upholstery, where only the top fabric layer is replaced while keeping the stuffing intact.
Can a Beginner Reupholster a Chair?
Yes, beginners can reupholster a chair. There are step-by-step guides available online specifically designed for beginners. With basic techniques and guidance, they can successfully take on this intermediate-level DIY project and give a fresh look to their furniture. Patience and attention to detail are key to achieving a custom and refreshed look for the chair while saving on costs.
Is It Worth Reupholstering an Old Chair?
Yes, it is worth reupholstering an old chair. Reupholstering offers benefits such as saving time and money, providing design certainty, being environmentally friendly, and allowing greater creativity in home design. Factors to consider include the chair’s style, quality, and overall costs compared to buying new furniture. Reupholstery can preserve well-built older furniture, contribute to environmental conservation, and update the chair’s look to match changing style preferences.
Conclusion
Congratulations! You have learned how to reupholster an antique chair in three easy steps. You have given your old chair a new look and a new life with your own hands and creativity. You can now enjoy your antique chair for years to come or even sell it for a profit if you wish.
Reupholstering an antique chair is a fun and easy project that anyone can do with some basic tools and materials. We hope you liked this blog and learned something new today. If you have any questions or comments, please let us know. We would love to hear from you and see your reupholstered antique chairs. Happy reupholstering!