A high chair banner is a great way to add a special touch to your child’s birthday party. Not only does it make for a great photo opportunity, but it also adds a festive atmosphere to the celebration. The best part is that you can easily make your high chair banner with simple materials and creativity.
There are many different ways to make a high chair banner, from using string and tape to creating a fabric garland. Whether you’re a crafty pro or a beginner, there’s an option for you. This guide will walk you through seven different methods for how to make high chair banner, each with its unique look and difficulty level. From simple and classic to bold and colorful, there’s something for everyone. So, let’s get started and make your child’s birthday celebration extra special with a DIY high chair banner.
7 Easy Methods for How to Make High Chair Banner
Here are 7 different methods for your child’s birthday highchair banner:
Method 1: String and Tape
Materials Needed:
- String
- Tape or sticky tack (packaging tape works best)
- Scissors
- Ruler
- Marker
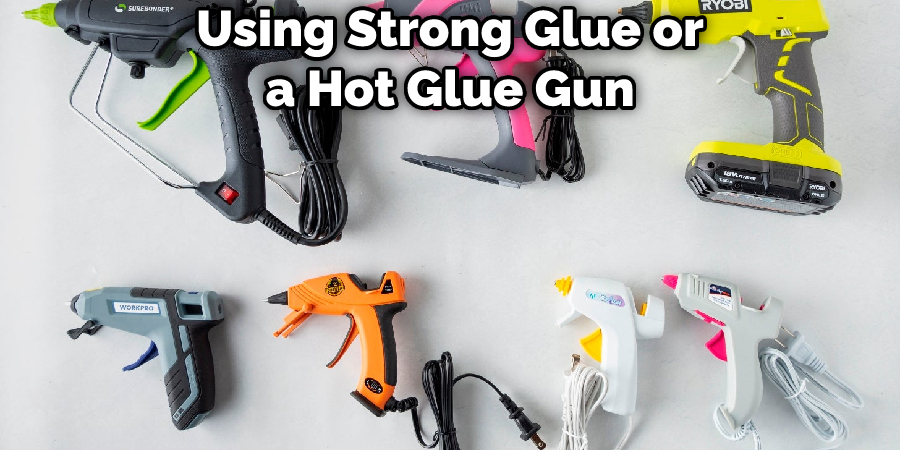
- Strong glue (a hot glue gun can work well)
- Felt, foam, or ribbons (optional for added decoration)
- Access to a printer (optional for adding lettering or designs)
Instructions:
- Gather your materials and measure the string length you need to cover the high chair’s table and backrest. Add an extra 14 inches for securing the banner to the chair.
- Using your ruler and marker, measure out and mark the desired width of your banner. Cut the string to the correct length using scissors.
- Now, you can add any decorative elements you like to your banner. You can use felt, foam, or ribbons to add a pop of color or pattern. You can also print out designs or lettering on paper and attach it to the string using tape or glue.
- Once you have your banner decorated to your liking, you can use tape or sticky tack to attach it to the high chair. Make sure it’s securely in place and adjust as needed.
- To secure the banner to the high chair, you can use strong glue or a hot glue gun. Apply a thin line of glue along the edge of the banner and attach it to the high chair’s table and backrest. Hold in place until the glue dries.
Tips:
- If you’re using a hot glue gun, be careful not to burn yourself or get too much glue on the chair.
- To ensure the banner is straight, use a ruler or measuring tape to measure the distance between the banner and the edge of the table or backrest.
- Using paint or fabric markers, you can add a personal touch to the banner by adding a child’s name or age.
Method 2: Fabric and Heat NBond Lite
Materials Needed:
- Fabric (about 1/4 meter)
- Heat NBond Lite
- Iron
- Scissors
- Ruler
- Marker
- Strong glue (a hot glue gun can work well)
- Access to a printer (optional for adding lettering or designs)
Instructions:
- Cut two pieces of fabric that are 17 inches long and 9 inches wide. Iron the fabric and set it aside.
- Using your scraps of fabric, attach them to the Heat NBond Lite following the instructions on the package. Cut out the designs or lettering you want to use for your banner.
- Once you have your designs or lettering cut out, you can attach them to the banner using the Heat NBond Lite. Follow the package instructions for attaching the designs to the fabric.
- Once your designs or lettering are attached, you can attach the banner to the high chair. Using strong glue or a hot glue gun, attach the top of the banner to the backrest of the high chair. Hold in place until the glue dries.
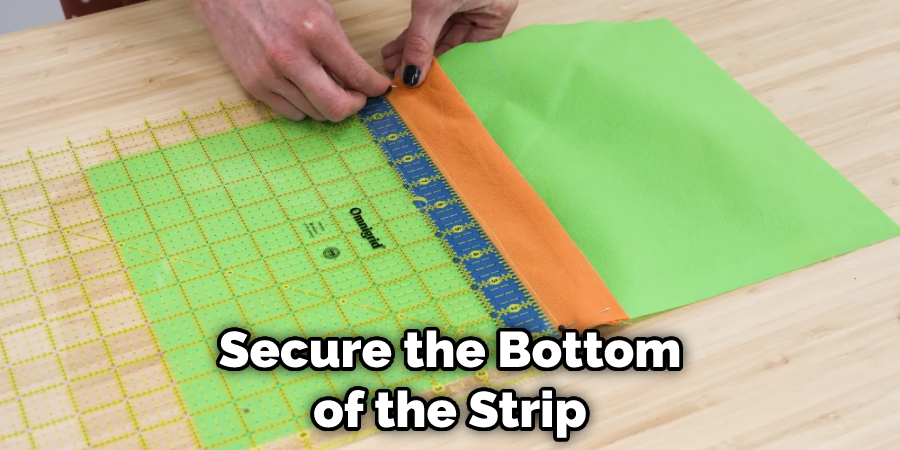
- To secure the bottom of the banner, you can use strong glue or a hot glue gun to attach it to the high chair’s table. Make sure it’s securely in place and adjust as needed.
Tips:
- Use enough Heat NBond Lite to adhere the designs or lettering to the fabric securely.
- If you’re using a hot glue gun, be careful not to burn yourself or get too much glue on the chair.
- To ensure the banner is straight, use a ruler or measuring tape to measure the distance between the banner and the edge of the table or backrest.
Method 3: Fabric Strips
Materials Needed:
- Fabric
- Scissors or another cutting instrument
- Strong glue (a hot glue gun can work well)
- Access to a printer (optional for adding lettering or designs)
Instructions:
- Cut your fabric into strips that are at least 4 inches wide and no more than 12 inches long. The number of strips you will need will depend on the size of your high chair and the desired coverage.
- You can add lettering or designs to the fabric strips by printing them on paper, cutting them out, and then gluing them to the fabric using glue or a hot glue gun.
- Once your fabric strips are ready, you can start attaching them to the high chair. Using strong glue or a hot glue gun, attach the top of the fabric strip to the backrest of the high chair. Hold in place until the glue dries.
- To secure the bottom of the strip, you can use strong glue or a hot glue gun to attach it to the high chair’s table. Make sure it’s securely in place and adjust as needed.
- Repeat steps 3 and 4 with the rest of the fabric strips until the high chair is fully covered.
Tips:
- You can use a different color or patterned fabric to add a pop of color to your banner.
- If you’re using a hot glue gun, be careful not to burn yourself or get too much glue on the chair.
- To ensure the banner is straight, use a ruler or measuring tape to measure the distance between the banner and the edge of the table or backrest.
- You can also use different widths of strips to create a unique pattern on your banner.
Method 4: Fabric and Parachute Cord
Materials Needed:
- Fabric (scraps or 1/4 meter of fabric)
- Parachute cord
- Scissors or rotary cutter
Instructions:
- Cut your fabric into strips of your desired length and width. The width of the strips can vary, but they should be long enough to drape over the high chair’s table and backrest. If you have a rotary cutter, it will make cutting the fabric strips much more straightforward.
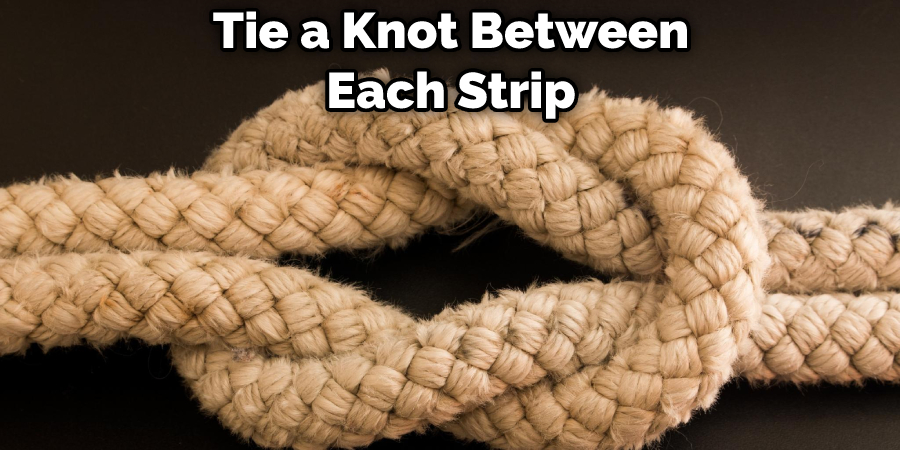
- Once your fabric strips are ready, take your parachute cord and tie a knot at one end.
- Thread the fabric strips onto the cord, and tie a knot between each strip to hold them in place.
- Once the strips are threaded onto the cord, you can attach the garland to the high chair. Using the knotted end, tie the garland to the top of the high chair’s backrest.
- To secure the bottom of the garland, tie the other end of the cord to the high chair’s table. Make sure it’s securely in place and adjust as needed.
Tips:
- You can use a different color or patterned fabric to add a pop of color to your banner.
- The width and length of the strips can be adjusted to suit your desired look and coverage.
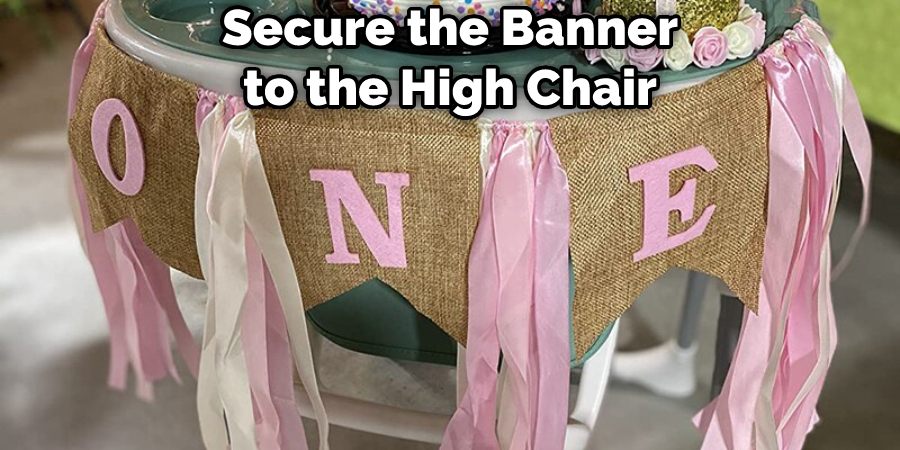
Method 5: Ribbons and Trim
Materials Needed:
- Variety of ribbons and trim (2 yards of each)
- Jute twine
- Burlap pennant
- Paint (colors of your choice)
- Small wide flat brush
- Stapler
- Scissors
Instructions:
- Measure the jute twine to the desired length needed to secure the highchair, plus an extra 14 inches for attaching the banner.
- Cut the ribbons and trim them to the desired length, usually around 12-18 inches.
- Using the paint and brush, add a personal touch to the burlap pennant by writing the child’s name or age.
- Start attaching the ribbons and trim to the jute twine using the stapler. Stagger the lengths of the ribbons and trim to create a layered look.
- Once you have all the ribbons and trim attached to the jute twine, you can now attach the banner to the high chair. Using the knotted end, tie the banner to the top of the high chair’s backrest.
- To secure the bottom of the banner, tie the other end of the jute twine to the high chair’s table. Make sure it’s securely in place and adjust as needed.

Tips:
- You can use different widths and types of ribbon and trim to create a unique look for your banner.
- Add additional embellishments like pom-poms, tassels, or beads to add fun.
- You can also use different colors of ribbon and trim to match the party theme.
Method 6: Ribbon and Glue
Materials Needed:
- Ribbon (variety of colors and widths)
- Glue gun
- Scissors
- Rope or twine
Instructions:
- Measure the length of rope or twine needed to cover the high chair’s table and backrest. Add an extra 14 inches for securing the banner to the chair.
- Cut the ribbon to your desired length. The ribbon width can vary, but they should be long enough to drape over the high chair’s table and backrest.
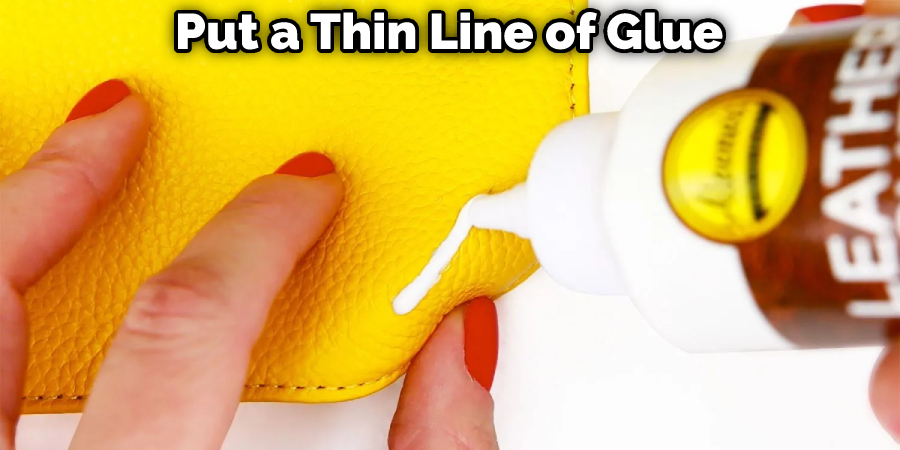
- Take your glue gun, put a thin line of glue on the edge of the ribbon and fold it over the rope or twine. Press it firmly in place and hold it until the glue dries.
- Repeat step 3 with the rest of the ribbon until the rope or twine is fully covered.
- Once the banner is complete, you can attach it to the high chair. Using the knotted end, tie the banner to the top of the high chair’s backrest.
- To secure the bottom of the banner, tie the other end of the rope or twine to the high chair’s table. Make sure it’s securely in place and adjust as needed.
Tips:
- Be careful not to get any glue on the rope or twine. Otherwise, you won’t be able to spread the ribbon out or move it closer together when you’re finished.
- To ensure the banner is straight, use a ruler or measuring tape to measure the distance between the banner and the edge of the table or backrest.
- You can also use different widths and types
Method 7: Spray Paint
Materials Needed:
- Banner (made of paper or lightweight fabric)
- Spray paint (colors of your choice)
- Painters tape or masking tape
- Scissors
Instructions:
- Measure the length of your banner that you will need to cover the high chair’s table and backrest. Add an extra 14 inches for securing the banner to the chair.
- Cut your banner to the correct length.
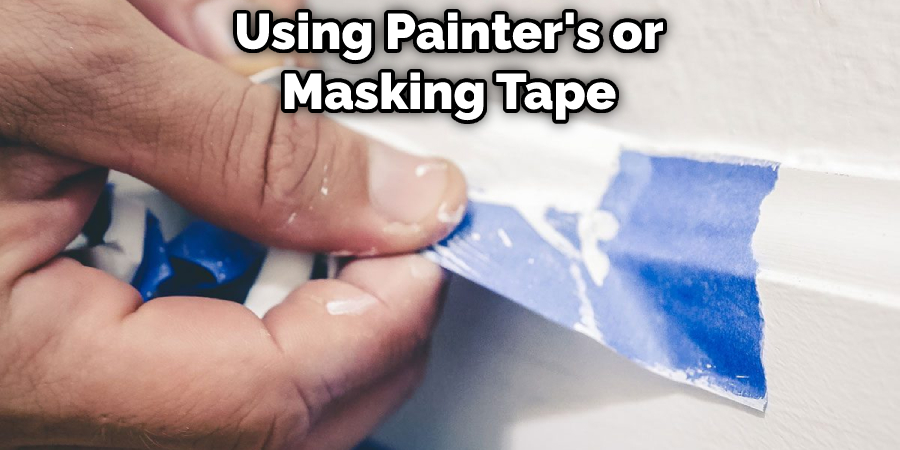
- Using painter’s or masking tape, secure the banner to a flat surface and cover any areas you do not want to be painted.
- Shake the spray paint can for 1-2 minutes after the mixing ball rattles.
- Hold the spray can about 12-16 inches away from the banner and spray in a sweeping motion, overlapping each pass slightly.
- Allow the paint to dry completely before removing the tape.
- Once the banner is completely dry, you can attach it to the high chair. Using the knotted end, tie the banner to the top of the high chair’s backrest.
- To secure the bottom of the banner, tie the other end to the high chair’s table. Make sure it’s securely in place and adjust as needed.
Tips:
- Be sure to use spray paint in a well-ventilated area.
- You can also use stencils to create patterns or designs on the banner.
- You can also use different spray paint colors to create a colorful banner.
You Can Check It Out to Add Footrest to High Chair.
FAQs About Making High Chair Banner
What String to Use for Banner?
When hanging a banner with grommets, you can use materials such as zip ties or bungee cords which are easy to use, adjustable, and holds up well in outdoor conditions. However, keep in mind that installing grommets requires a grommet machine, which can be costly and hard on your arms and back. Some banners come with grommets already installed.
What Kind of String Do You Use to Hang Banners?
Various strings can be used when hanging a banner without grommets, such as ribbon, PowerTape, pins, nails, and tape. Each method has its benefits, and choosing the best one for your specific banner and hanging location is essential.
Conclusion
Making a high chair banner is a great way to add a special touch to your child’s birthday party. With the seven methods outlined in this guide, you can easily make your high chair banner with simple materials and creativity. From using string and tape to creating a fabric garland, there’s an option for every skill level. You can choose the one that best suits your needs, be it easy, classic, or bold and colorful. Whether a crafty pro or a beginner, you can create a beautiful high chair banner to make your child’s 1st birthday celebration memorable. With a bit of time and effort, you can make a unique and personalized high chair banner that will be a lasting memory for you and your child.