If you love spending time outdoors, you know comfortable seating is a must. And what better way to relax in the great outdoors than in a classic Adirondack chair? These sturdy, slatted chairs are a staple of backyard and patio furniture, and with their wide armrests and comfortable angle, they’re perfect for kicking back and enjoying the scenery.
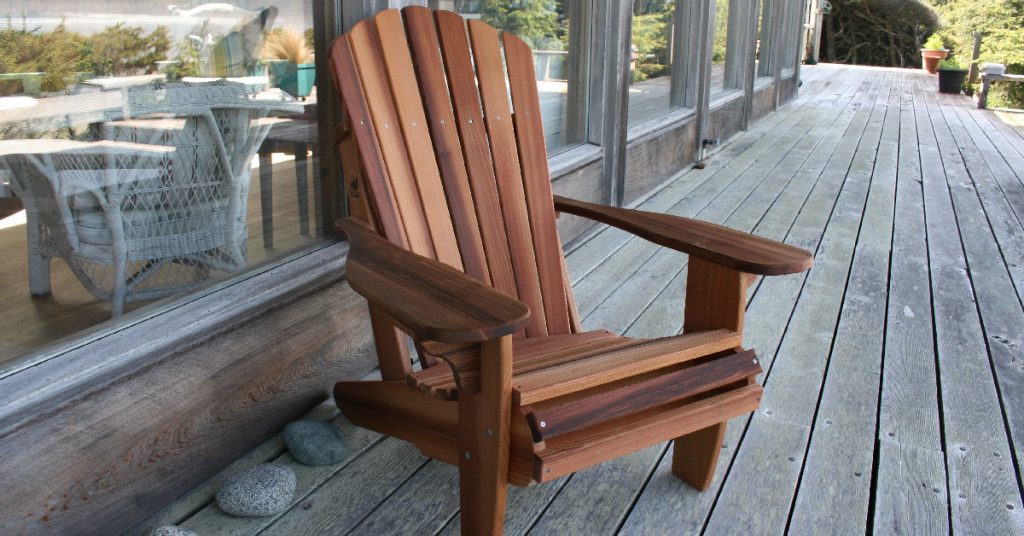
But if you’re like me, a regular-sized Adirondack chair just doesn’t cut it. You want something more significant, grander, and more impressive. Something that says, “I’m not just lounging here; I’m living my best life.” If that sounds like you, then I’ve got good news: it’s pretty easy for how to build a giant adirondack chair.
Benefits of Building Your Adirondack Chair (Including Cost Savings and Customization Options)
There are a few benefits to building your Adirondack chair rather than buying one pre-made.
- First and foremost, it can save you some money. While you can find decent-quality Adirondack chairs for under $100, they can easily cost much more, especially if you’re looking for something extra sturdy or made from higher-quality materials. You can choose your materials by building your chair and keeping costs down.
- In addition to the cost savings, building your chair allows you to customize it to your specifications. Consider wider armrests for a more comfortable fit or a steeper angle for the backrest. Use a specific type of wood or stain to match your outdoor furniture.
Whatever your preferences, building your chair gives you complete control.
You Can Check It Out to Tell if Cesca Chair is Real

7 Easy Step-by-Step Guide for How to Build a Giant Adirondack Chair
So, are you ready to start building your own giant Adirondack chair? Here’s what you’ll need:
Gather Materials and Tools
- Wood: You’ll need enough wood to cut out all the pieces for the chair frame. A good option is cedar, which is durable and resistant to rot. You’ll also want to choose wood that is at least 1″ thick, to ensure that the chair is sturdy.
- Screws: You’ll need screws to hold the pieces of the chair frame together. Make sure to choose screws that are long enough to reach through the thickness of the wood but not so long that they come out the other side.
- Other hardware: You’ll also need a few other items to complete the chair, such as brackets for attaching the backrest and armrests and nails or staples for attaching the slats.
- Tools: You’ll need a saw, a drill, a hammer, and a measuring tape.
Step 1: Cut Out the Pieces for the Chair Frame
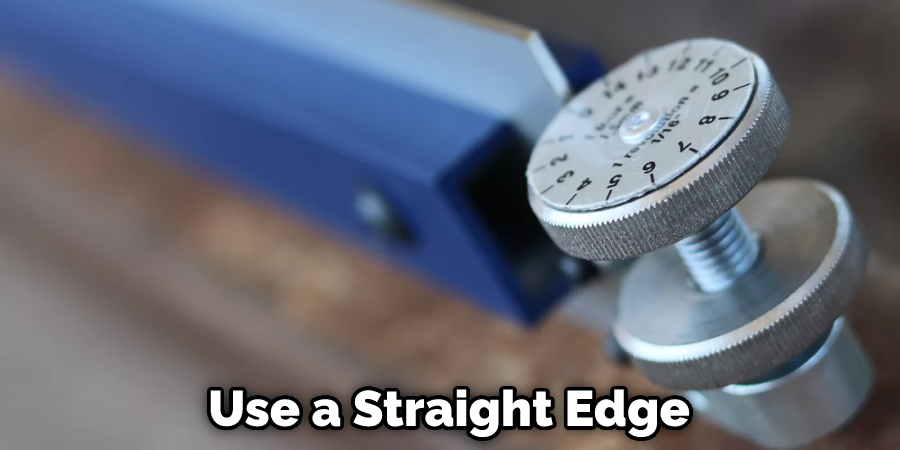
Cut out the pieces for the chair frame. You’ll need two side pieces, a front piece, a back piece, and a seat piece. Use a saw to cut these pieces to the desired size and shape carefully. Measure and mark the wood with a pencil, then use a straight edge or a square to ensure straight, precise cuts.
Step 2: Assemble the Chair Frame
Assemble the chair frame. Start by attaching the front and back pieces to the side pieces using screws. Pre-drill holes in the wood to make it easier to screw the pieces together. Then, attach the seat piece to the front and back pieces. Make sure to use enough screws to hold the frame together securely.
Step 3: Attach the Backrest
Attach the backrest. Using brackets or screws, attach the backrest to the back piece of the chair frame. Make sure the angle is comfortable for sitting. Use a level to ensure that the backrest is straight.
Step 4: Attach the Armrests
Attach the armrests. Using brackets or screws, attach the armrests to the side pieces of the chair frame. Again, make sure the angle is comfortable for sitting. You may need to use wood glue to help hold the armrests in place.
Step 5: Attach the Slats
Attach the slats. Using nails or staples, attach the slats to the seat and backrest to complete the chair. Start by attaching the center slats first, then work your way outwards. Make sure the slats are evenly spaced and aligned with each other.

Step 6: Add Optional Finishes and Decorations (Optional)
Add finishes and decorations. If you want to add a flair to your chair, you can stain or paint the wood to match your outdoor decor. You can also add cushions or throw pillows for extra comfort.
Step 7: Maintain and Enjoy Your Giant Adirondack Chair
Enjoy your chair! Now that your giant Adirondack chair is complete, it’s time to sit back and relax. To keep your chair looking its best, regularly maintain it by sanding and refinishing the wood as needed and cleaning it with a mild soap and water solution. And when you’re not using it, be sure to cover it or store it in a dry place to protect it from the elements.
You Can Check It Out to Clean Inglesina Fast Table Chair
FAQs about Building a Giant Adirondack Chair
Are Adirondack Chairs Hard to Build?
Adirondack chairs are relatively easy to build, especially if you have basic carpentry skills and access to the right tools. The process involves cutting the pieces for the chair frame, assembling the frame, attaching the backrest and armrests, and attaching the slats. With clear instructions and some patience, most people should be able to build an Adirondack chair in a day or two.
However, it may be more challenging if you have limited carpentry experience or use materials or techniques that are new to you. It is always a good idea to follow the instructions carefully and to take necessary precautions, such as wearing protective gear and using tools correctly.
What is the Best Wood to Use for an Adirondack Chair?
The best wood for an Adirondack chair is a durable, weather-resistant wood such as cedar, redwood, or teak. These woods naturally resist rot and decay and hold up well outdoors. They are also relatively easy to work with and have a natural beauty that complements the rustic look of an Adirondack chair.
Other options include pressure-treated pine or composite materials, resistant to the elements but may not have the same natural look and feel as cedar or redwood. The best wood choice will depend on your personal preferences and budget.
Conclusion
In conclusion, building a giant Adirondack chair is a fun and rewarding DIY project that can provide comfortable outdoor seating for years to come. With some planning and basic carpentry skills, you can quickly build your chair and customize it to your specifications. So why not give it a try? Your backyard (and your relaxation) will thank you.